Choose a small, useful starting point
Painting every door and length of trim at once can turn a modest update into a disruptive project. Start with one interior door, its frame, or the baseboards along a single wall. In a compact room, the best first choice is often the surface you see most: the door beside a desk, for example, or the trim behind a sofa. Finishing one contained area lets you learn the process before deciding whether the rest of the room needs attention.
Look closely before buying paint. Are the marks surface scuffs that cleaning might remove, or are there chips and worn patches that need a new coat? Wipe a small area with a damp cloth and mild cleaner, then let it dry. If it looks good afterward, you may not need to paint it. If the finish is damaged, note any loose paint, dents or gaps so you can plan for filler or primer rather than relying on paint to hide them.
Gather supplies without overbuying
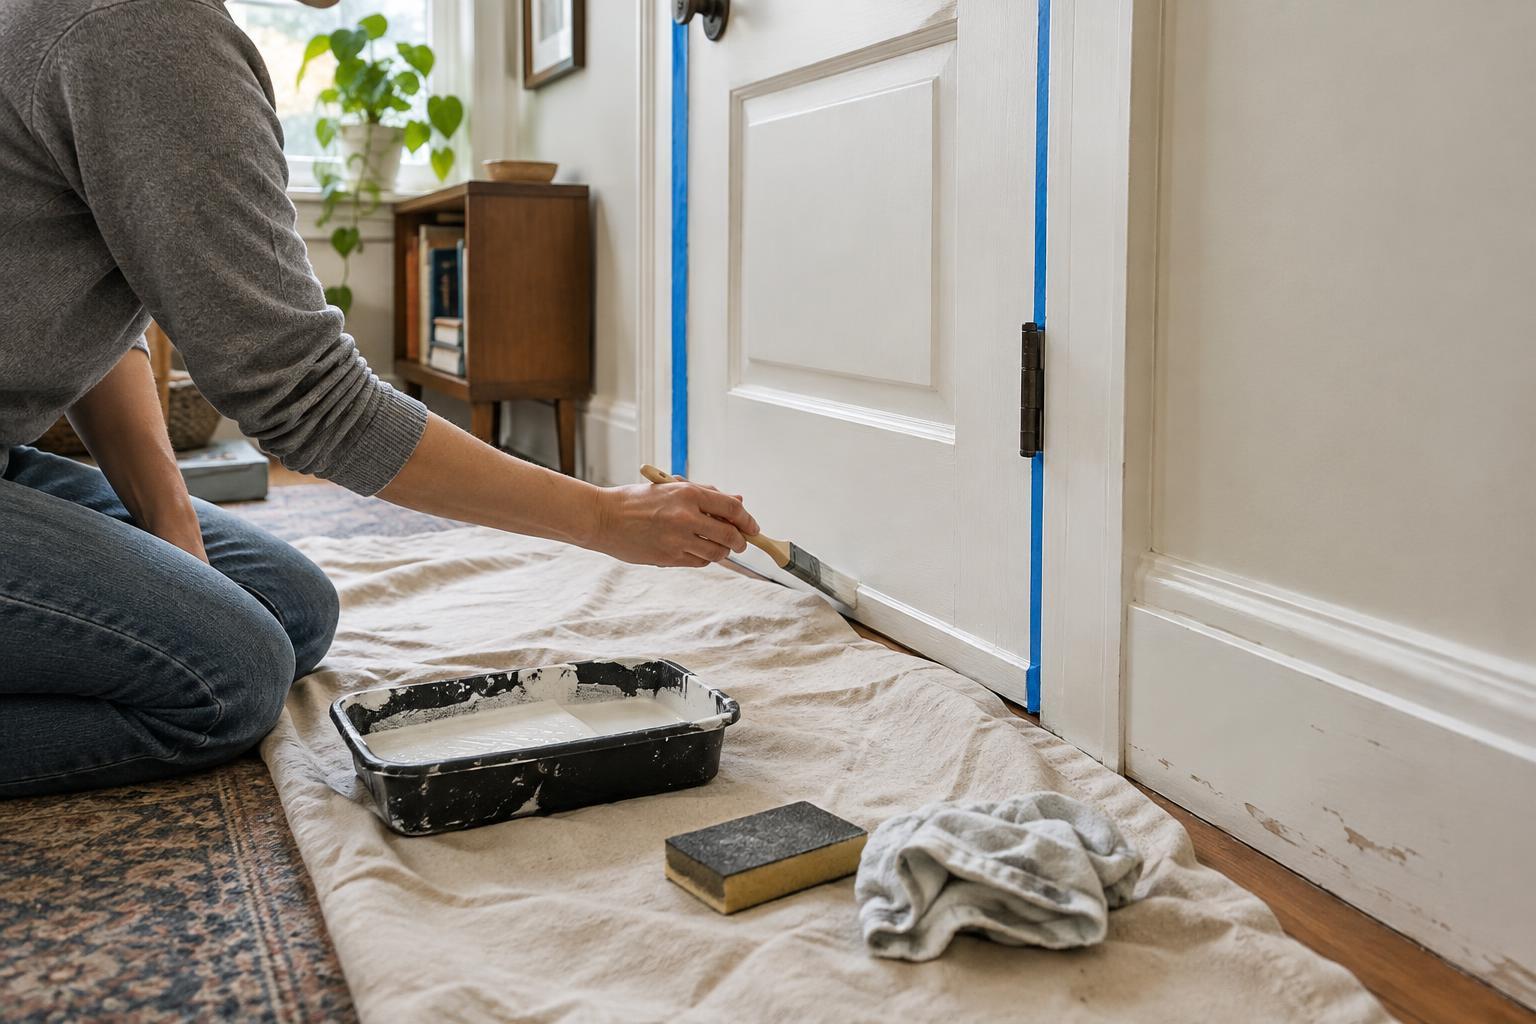
For a small job, a washable drop cloth, mild cleaner, cloths, painter’s tape, a small angled brush and a mini roller may be enough. Add filler and a putty knife for small dents, plus fine abrasive paper or a sanding sponge for sound, modern finishes that need smoothing. If you do not know what an older coating contains, avoid sanding or scraping it until you have checked how to handle it safely. Wear suitable protection for the preparation method you use, and keep the room ventilated.
Choose paint intended for interior doors and trim, and check the label for suitable surfaces, drying times and whether a primer is needed. A water-based trim paint can be convenient for a beginner because cleanup is generally straightforward. A soft satin or semi-gloss finish is often easier to wipe than a flat wall finish, though a shinier surface can make bumps more noticeable. If you want to stay close to the existing color, bring a removable sample or a clear photograph to the paint shop rather than guessing from memory.
Keep the budget focused on preparation and a suitable finish, not a large collection of tools. Borrow a drop cloth if possible, use a small paint container when the coverage allows, and check what you already own before shopping. Spending a little time testing the color on an inconspicuous spot can be more useful than buying several shades at once.
Prepare the surface and the room
Clear enough floor space to work comfortably and place the drop cloth where drips might land. A door can usually stay on its hinges for a modest refresh. Open it wide, secure it so it cannot swing, and protect the floor beneath its bottom edge. Remove handles or other hardware if that is easy; otherwise, mask them carefully. Tape the wall beside trim only if you need the help of a guide, pressing the tape edge down firmly.
Wash the surface to remove handprints, dust and grease, especially around handles and near the floor. Let it dry fully. Fill small dents according to the filler instructions, then smooth the repaired spots once they have hardened. On a sound finish, lightly smooth rough areas and remove the resulting dust before painting. Prime bare wood, filler or other exposed patches if the paint instructions call for it. If old paint is peeling widely, or the surface feels damp or swollen, address that problem before putting on a fresh coat.
Paint in thin, manageable coats
Stir the paint and work in good light so you can spot drips while they are still wet. Use the angled brush for edges, grooves and narrow trim. On broad, flat door panels, a mini roller can help lay down an even coat; lightly smooth any heavy edges before the paint starts to set. Work on one section at a time and follow the shape of the door rather than jumping between wet and dry areas.
Thin coats are easier to control than one heavy coat. Check the label before recoating, since a surface that feels dry to the touch may not be ready for another layer. Keep the door open and secured while the paint dries so it does not stick to the frame. Remove tape as directed for the tape and paint you used, and check the door edges before closing it. If paint buildup makes the door rub, do not force it shut.
Let the finish settle, then protect it
Once the final coat is dry enough to handle, replace the hardware and look at the result in daylight. A tiny missed spot can be touched up with a brush; a noticeable drip may need to harden before it can be smoothed and repainted. Give the finish the curing time stated on the paint label before scrubbing it or hanging anything against it. Drying and curing are not always the same thing.
In a multipurpose room, the lasting improvement may come from a small habit as well as fresh paint. Wipe marks near the handle with a soft cloth before grime builds up, and keep bags or furniture from repeatedly striking the trim. If the first door goes well, use what you learned to plan the next one. A consistent finish across a few high-traffic surfaces can make the room feel more cared for without requiring a full renovation.