Choose privacy for the view you need to block
Window film is a small decorating project with a useful job: it can make a bedroom, bathroom or street-facing workspace feel less exposed without covering the entire window with a curtain. Before buying a roll, stand where you normally sit or move around the room. Notice which part of the glass gives neighbors or passersby a direct view. A strip across the lower half may be enough, leaving the upper pane clear for sky and daylight.
Frosted and lightly patterned films are often good starting points when brightness matters. They blur shapes rather than making the glass opaque, so compare samples against the window at home if you can. A dense pattern may look subtle on its backing paper but dimmer once it covers a whole pane. If you need a clear view out, consider filming only the portion that faces another window or a walkway.
Do not assume that every product described as “privacy film” works the same way. Mirror-style films depend on a difference in light levels and may offer much less privacy after dark when the room is lit. Frosted film also varies: silhouettes can still show when someone stands close to the glass. For rooms where that matters, plan to use a blind or curtain as a second layer.
Check the window and plan the layout
Read the film maker’s instructions before choosing a pattern or cutting a sheet. Some films use static cling; others have a removable adhesive. Their application and removal methods can differ. Check that the product is suitable for your type of glass, especially if the window is coated, tinted, insulated or exposed to strong sun. If the guidance is unclear, ask the film maker or window supplier rather than guessing. In a rental, check whether applying film is permitted.
Measure the visible glass, then decide where the film should end. For a neat partial-height treatment, use the window frame as a reference and mark the same height on both sides with small pieces of removable tape. A plain frosted band usually suits a compact room because it does not compete with shelves, artwork or patterned textiles. If you want a decorative design, try repeating it across matching panes rather than mixing several motifs.
Budget for a little extra material so you can make a test piece and allow for trimming. Keep costs down by treating only the panes that need privacy instead of every window in the room. A small offcut held against the glass in daytime and again with the room lights on can help you judge both brightness and coverage before you commit.
Prepare a clean, comfortable work area
Most visible flaws start with dust, lint or residue on the glass. Move nearby furniture out of the way, protect the sill with an old towel and clean the pane thoroughly. Pay attention to corners and edges, where dirt tends to collect. Let the glass dry or keep it damp according to the film’s directions. Avoid working beside a fan or an open window that blows dust onto the surface.
Gather a measuring tape, straightedge, soft cloth and a plastic squeegee or card wrapped in a clean cloth. If cutting is needed, use a sharp tool only where the manufacturer recommends it; a blade used directly on the pane may damage coatings or seals. Cutting the film on a separate, protected surface can feel less awkward, particularly for a narrow privacy band.
Some films require a light spray of water or an approved solution so the sheet can slide into place. Others are designed for a different method. Follow the specific instructions rather than adding soap or soaking the adhesive by habit. If this is your first attempt, start with the smallest pane. It is easier to learn how the material handles before working across a large window.
Apply the film slowly and check it from both sides
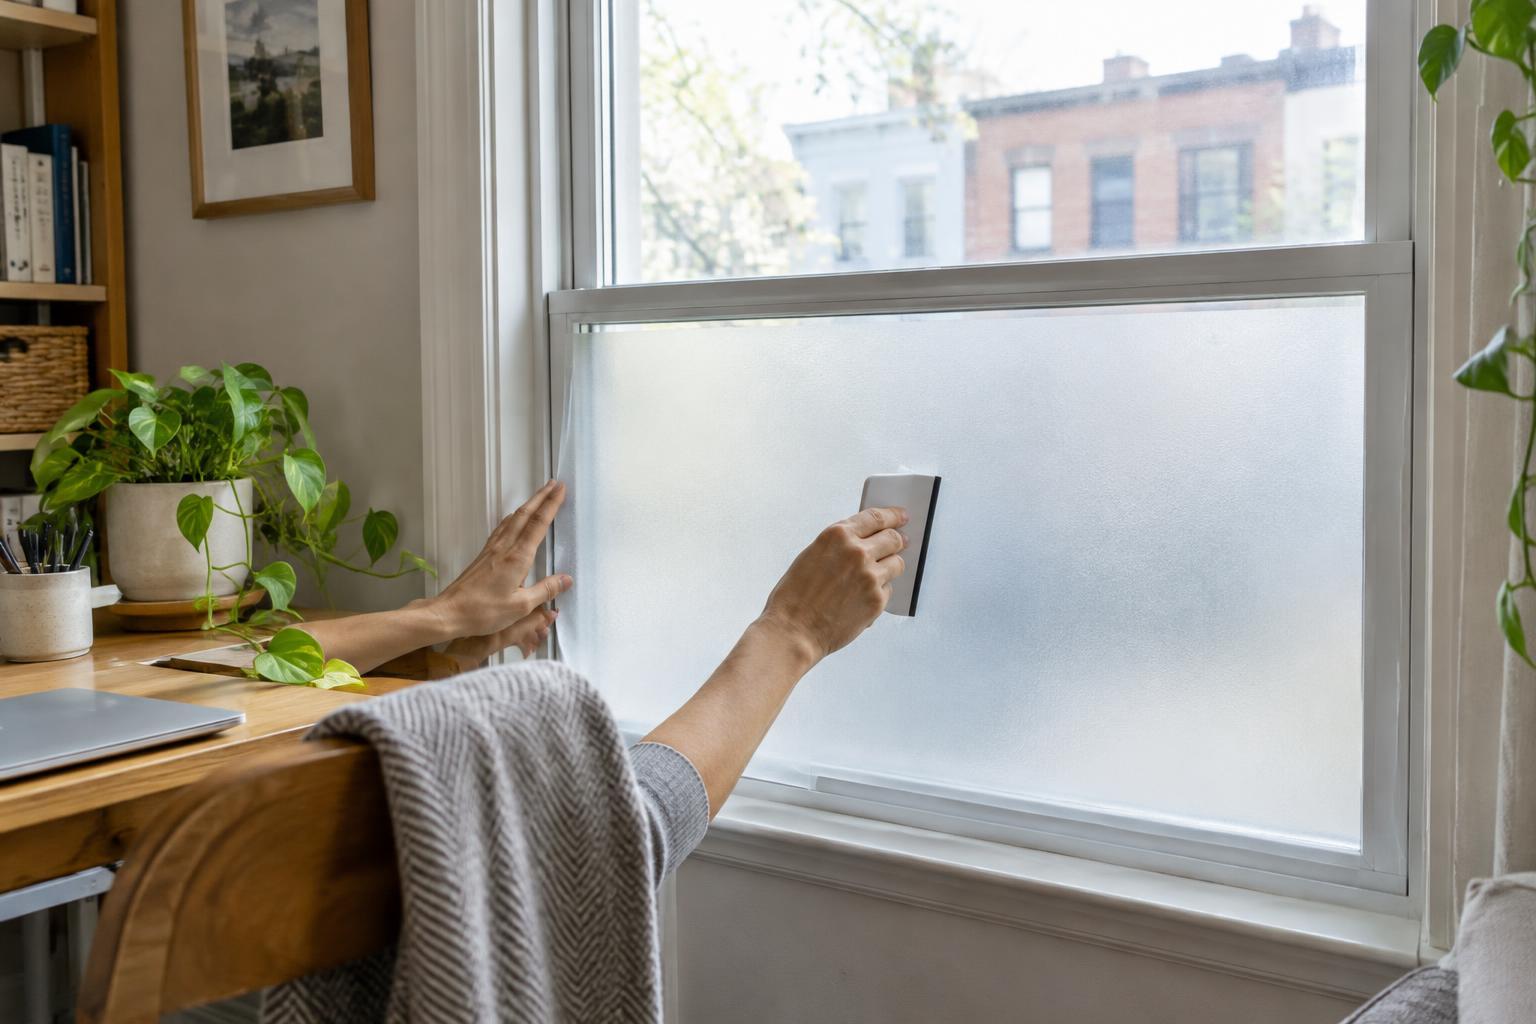
Position the sheet at the top edge or at one marked corner, then lower it gradually while smoothing outward from the center. Work in short passes rather than trying to press down the entire sheet at once. Keep the edge aligned with your layout marks, and avoid stretching the film to correct a crooked start. If the product allows repositioning, lifting and resetting a section is usually tidier than forcing a crease flat.
Push excess application liquid and air toward the edges with gentle, even pressure. Wipe the edges as you go, then follow the product guidance on trimming and drying time. A few small cloudy patches may clear as a wet application dries, but grit or a firm crease is unlikely to disappear. Before putting the tools away, look at the window from your usual seat and from outside where access is practical. This reveals gaps or sightlines that are hard to notice while standing close to the glass.
Live with it for a few days before adding more
A window can feel different in morning light, on a dull afternoon and after the room lights come on. Give the first pane a few days before covering the rest. If the room feels too dim, try a shorter band or a less dense pattern on the next pane. If privacy is still lacking, a simple blind may solve the problem more reliably than another layer of film.
For upkeep, use the cleaning method recommended for the product and avoid scraping the film’s edges. When it is time to remove it, follow the maker’s directions and test a corner first. Taking it off slowly helps reduce the chance of leaving residue or pulling at a vulnerable window surface. That reversibility is part of the appeal: you can adjust the treatment as furniture moves, a room changes purpose or your privacy needs shift.